
Creating a GitHub Repository
C. BinKadal
---
Sendirian, Berhad
List of Contents
GitHub Repository
These instructions are subject to change. They were accurate as of July 2023.
To create a GitHub repository, select the leftmost “Create Repository.” If you choose “Create a new repository” (right), the menu will differ!
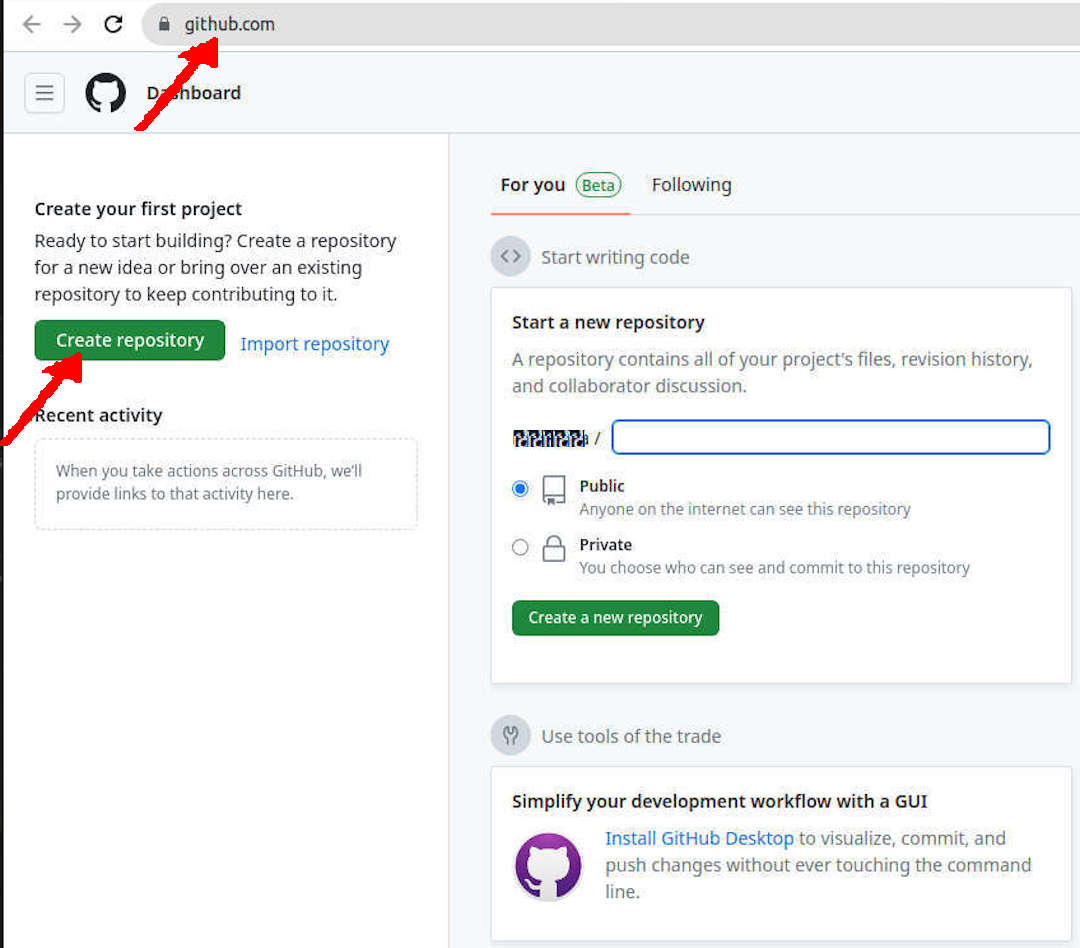
Create Repository
In this example,
- the user account is “cbkadal,”
- Remember: you are not cbkadal!
- the repository name is “os232”.
- Your repository name may be different.
ℼ
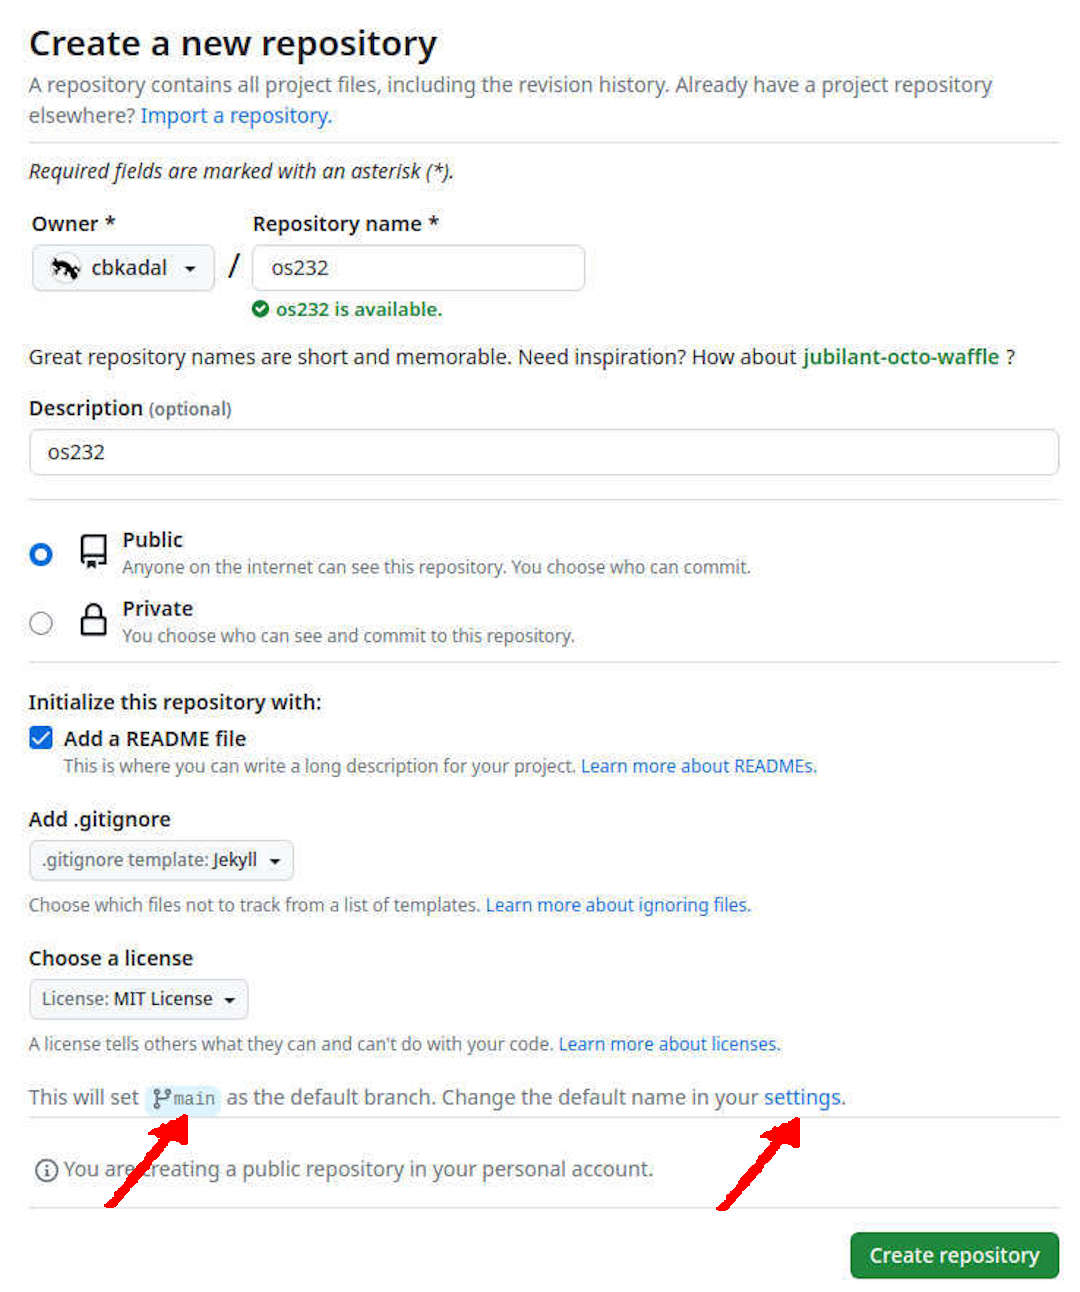
Filling the fields:
- Repository name: os232 (lowercase).
- Description (optional): os232 (you may alter it later).
- Public Repository (do not select private).
- Add a README file (selected).
- .gitignore: jekyll
- License: MIT License (or select any open license).
- default branch: main.
- The default branch name was “master,” considered politically incorrect. If you click “settings,” it will go to the “Repository Default Branch.”
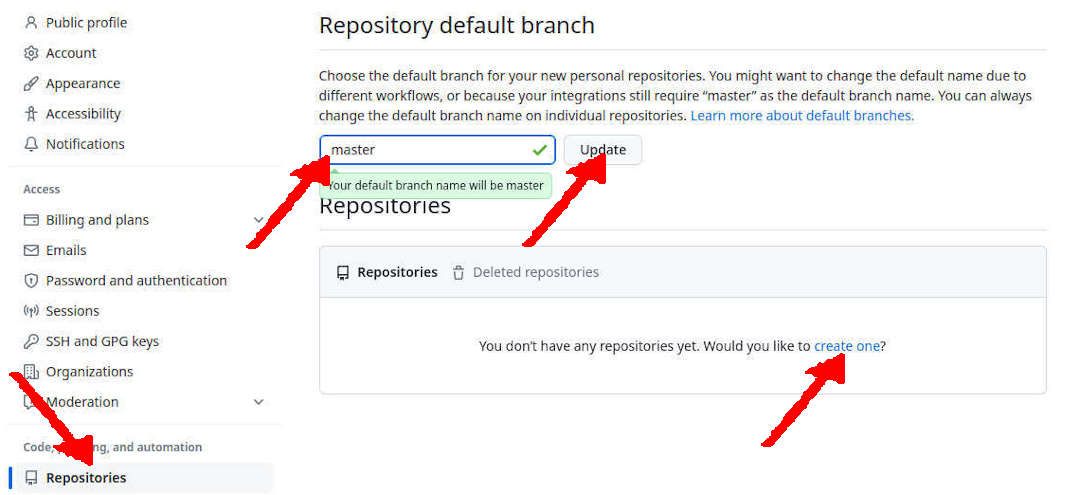
Repository Default Branch
In “Repository Default Branch,” you can alter the default branch to anything you wish—E.g., “Master” (was “Main”). Enter the new default branch name and select “update.”
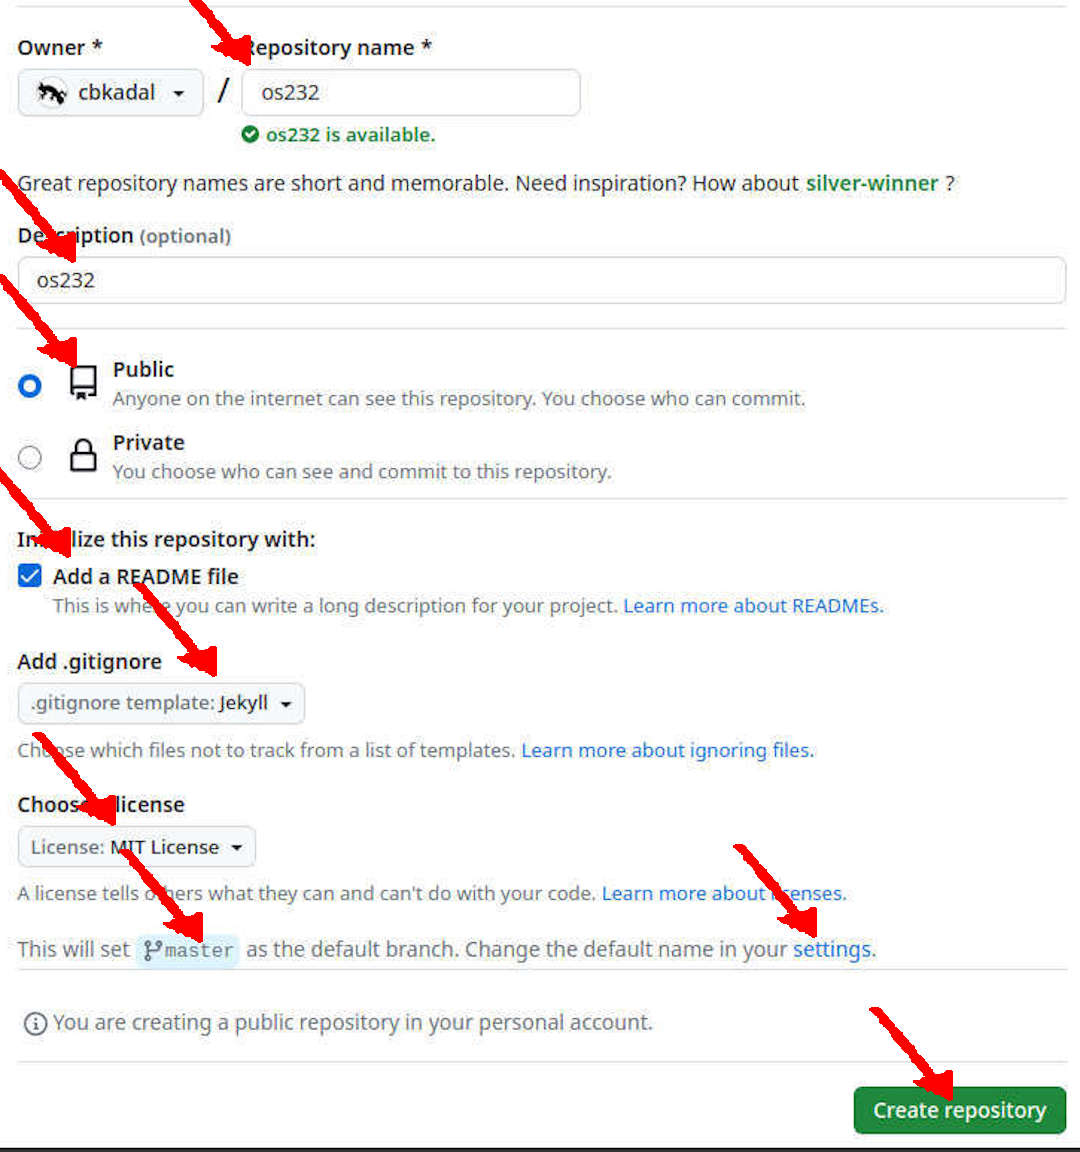
Next, you may continue to create a new repository (Again!).
- Create a new Repository (Again!).
- Repository name: os232 (lowercase).
- Description (optional): os232 (you may alter it later).
- Public Repository (do not select private).
- Add a README file (selected).
- .gitignore: jekyll
- License: MIT License (or select any open license).
Visit Create a GitHub Page
© 2021-2024 --- C. BinKadal ---
About ---
Revision: Tue 26 Nov 2024 18:00.